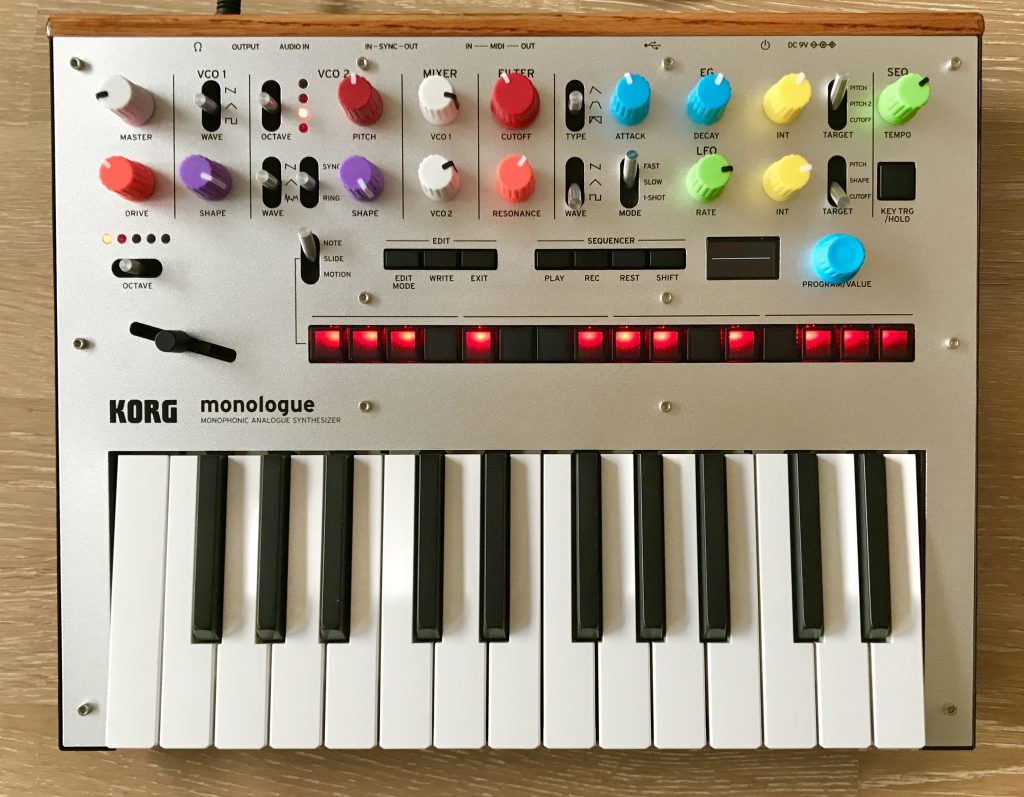
Korg monologue Rechargable Battery Mod Prototype

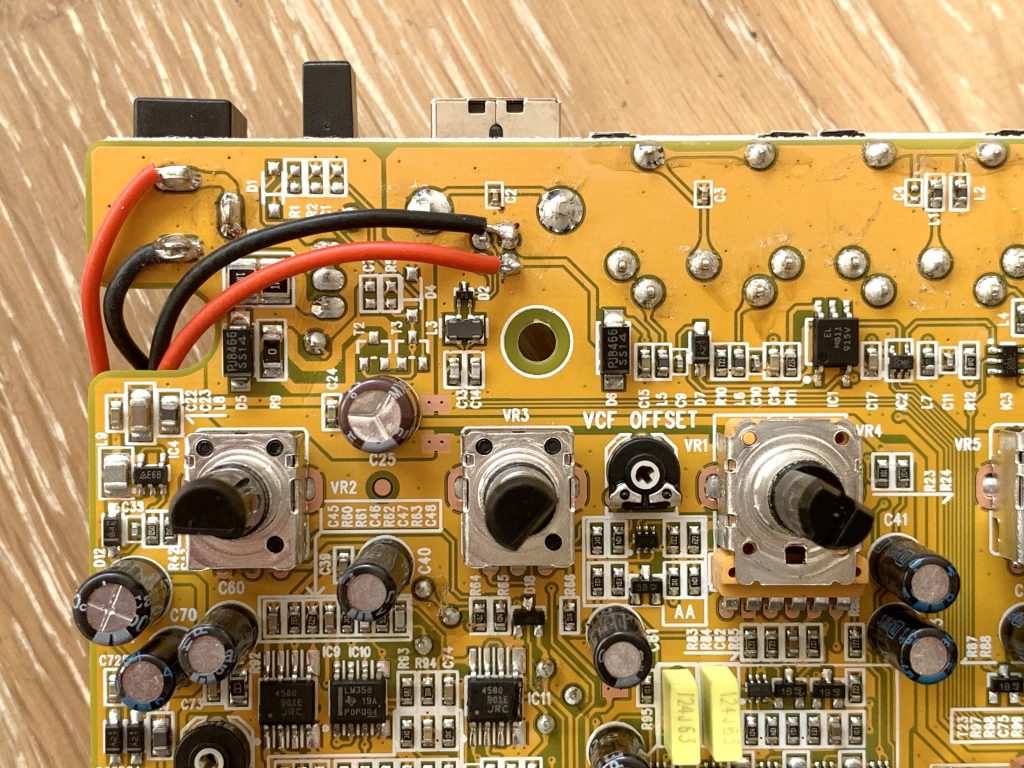
My Behringer TD-3 mod worked nicely, so it was time to proceed to the monologue. It already is battery powered, but using 6 batteries and recharging done outside of the device. In my opinion a built-in single battery is more appropriate.

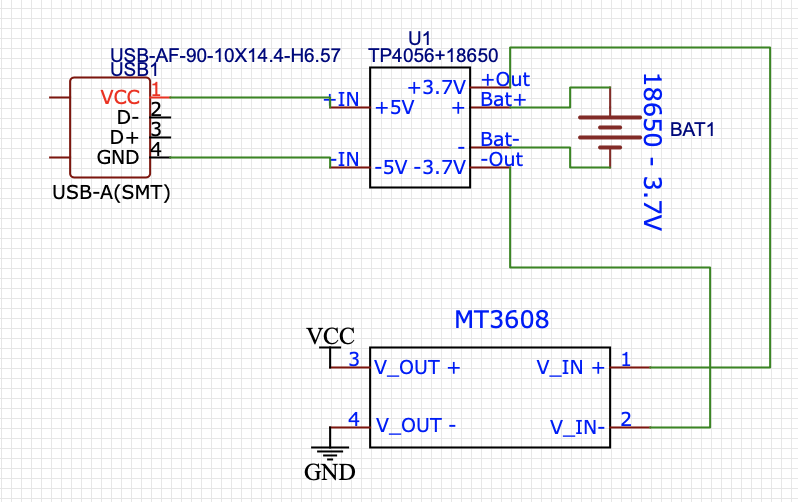
To see the schematic and soldering have a look at the original TD-3 post. The monologue has an even better preparation for the mod since it is built to be operated on battery and 9V, so I assume there is effective and efficient power ORing included.

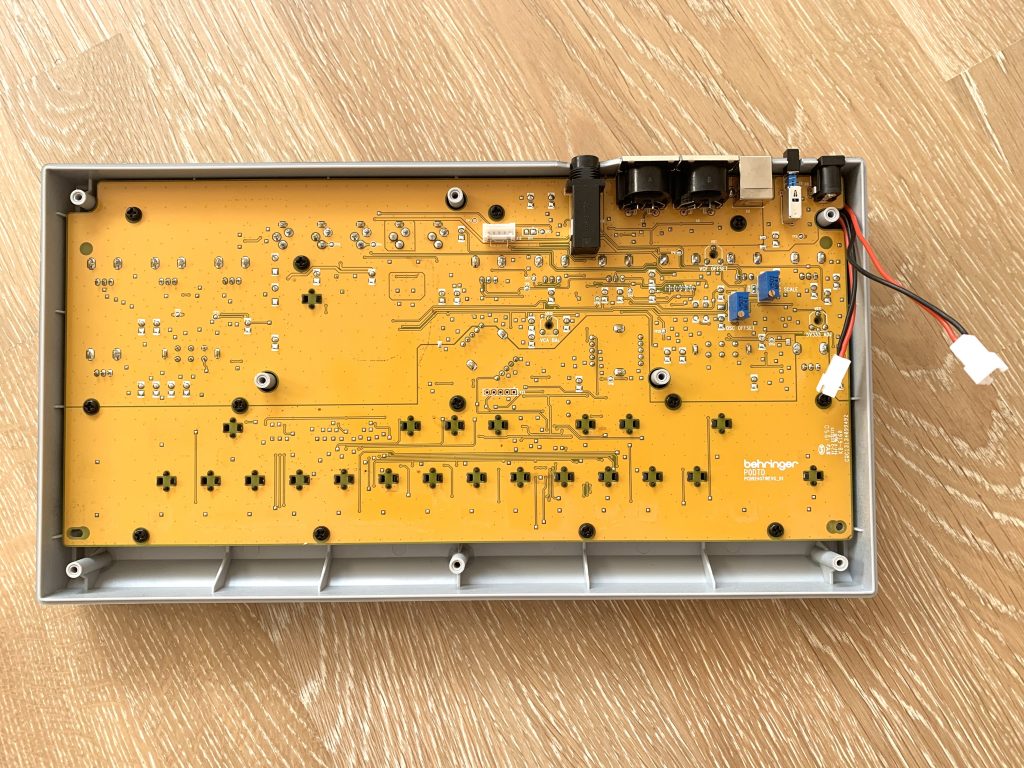
On the other hand, there is less space in the device, so careful placement is key.

Resulting positioning
Li-Ion powered, USB-charged monologue

As soon as I have any numbers regarding battery life I will post an update. If you are interested in the knobs: https://ekartco.com/2020/03/korg-monologue-and-minilogue-xd-color-coding-using-chroma-caps/

The device charges and connects via USB on my iMac, so no issues here. The only thing that I need to check is power draw in standby. I assumed that batteries will get protected by KORG anyway, but the “soft” power switch might be draining too much.

My assumption in the above post was that the minilogue pulls less current than the TD-3 and the power surge at startup is not as strong. However, when the KORG is powered on and the battery is not full anymore, the same issue shows up as on the TD-3. Therefore, I will need to short the TP4056 BAT- and Vout- in just the same way as in the TD-3.

@gekart

Posted in Uncategorized | Comments Off on Korg monologue Rechargable Battery Mod Prototype

Behringer TD-3 Rechargable Battery Mod Prototype

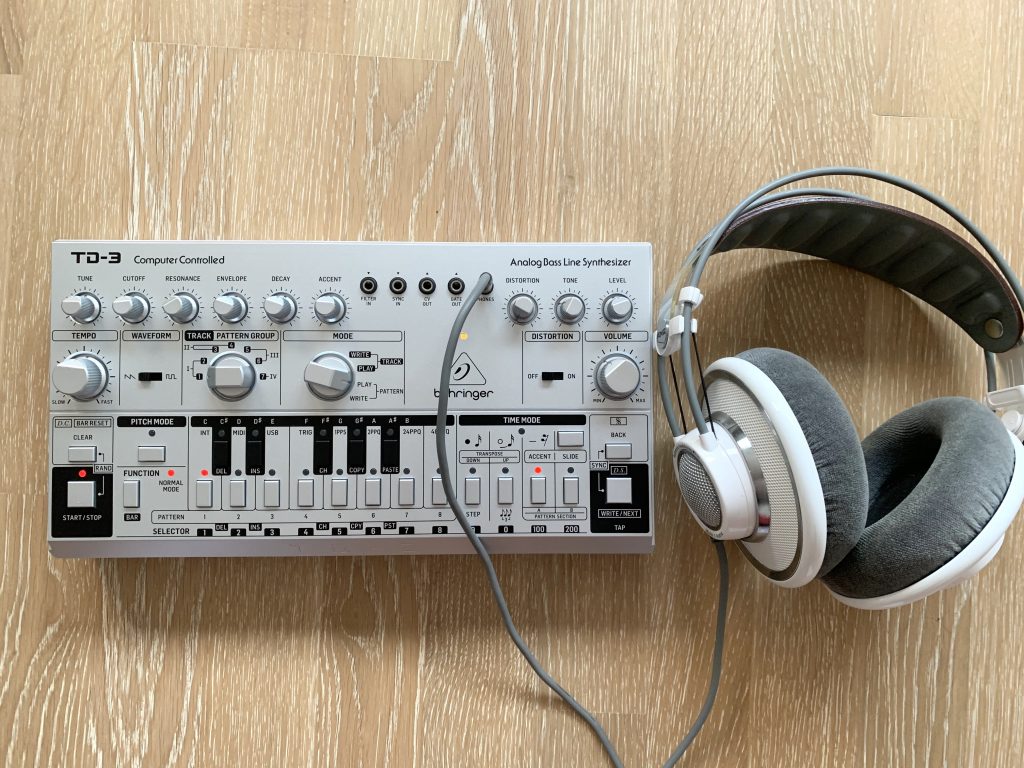
I love Behringer’s approach to tech and synths. The TD-3 is super affordable and performs like a charm. The community has quickly started modding the TB303 clone and I also decided to give it a simple mod: if there is something I don’t like, its cables! Also why use a 9V power wart, when there’s USB power.

I wanted to experiment with 18650 lithium ion battery cells that I will use in other contexts. The Sony 18650 VTC6 batteries that I am using deliver 3.7V on average and around 3000mAh. I would need charging electronics and then somehow try to make them deliver the 9V that the TD-3 expects.

My requirements were:

  • all components are located in the TD-3
  • battery is charged using USB or 9V while powering the device (USB preferred)
  • when unplugged, deliver 9V for the device
  • seamless plugging and unplugging (like a mobile phone)
  • enough power for a day

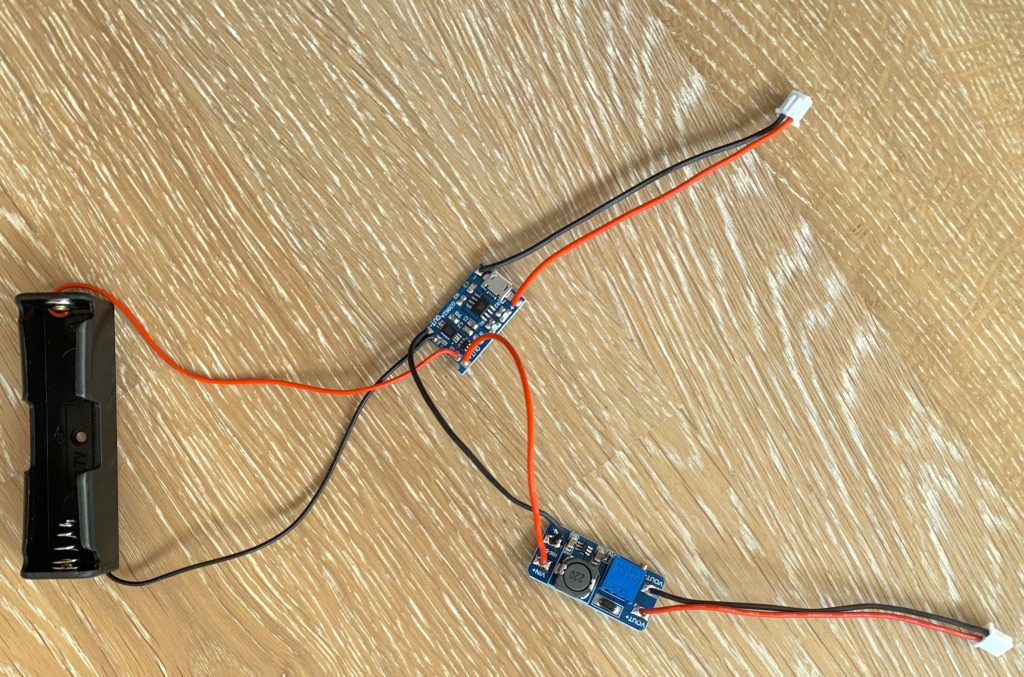
After some research I found the TP4056 USB charging module and MT3608 step-up converter that seem to work almost perfectly. I am picking up USB Bus (5V) and deliver the 9V at the wart connector.

Here are some pics:

Schematic
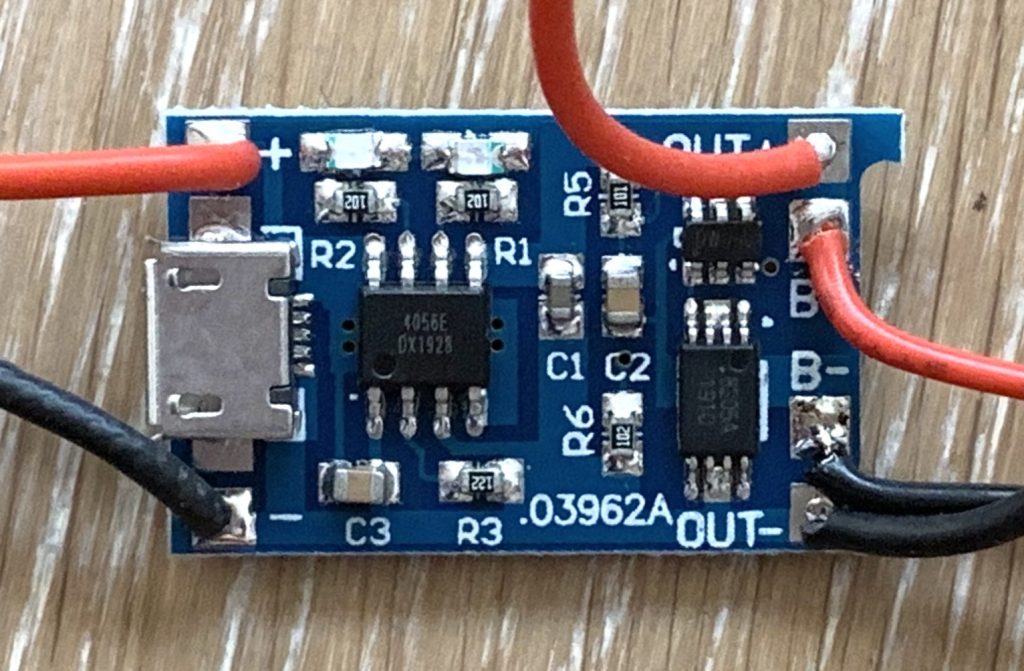
TP4056, the version with protection circuit, micro USB port is unused
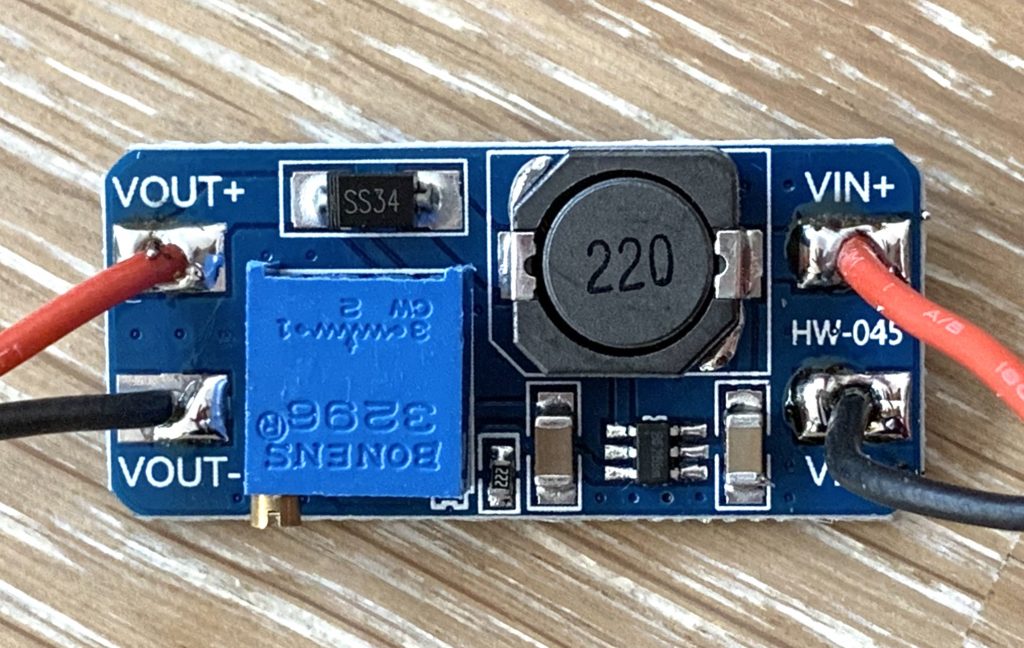
MT3608 with a multi-turn potentiometer to adjust Vout to 9V precisely. Turning the pot to the left multiple times will eventually show 9V on Vout.
Soldering finished
Cables fit nicely through the prepared holes
Finished battery module
Fitting room
Works like a charm: way more than ten hours of power while playing a song and powering the headphones

Issues:

  • It seems that the protection circuit of the TP4056 fires when switching on the TD-3. My tests with the KORG monologue do not show that power surge. The quick fix was to short-circuit BAT- and OUT- on the TP module, since the MT3608 includes a protection module anyway. But I would like to solve this before calling it a day.
  • I am using the TP4056 OUT+/- as power delivery to the MT3608 even during charging. It works, but I suppose a better way would be to take the USB Vbus and OR it with the battery out using two Schottky diodes, or even better ideal diodes (like SM74611 with a super low loss).
  • The 9V in connector needs to be desoldered (I am not using it anymore, but it would lead to problems if anyone connects the wart…).
  • MT3608 draws power constantly (300µA) from the battery, even when the device is off. However, it should take a year to drain the battery before the undervolt protection circuit kicks in.
  • I need to test USB power draw. It worked with all chargers that I tested and my iMac.

A nice coincidence: The charging LED is bleeding softly through the function LED of the TD-3 (exaggerated in the pic), so that I can see when charging is finished (red charging/ blue fully charge):

Parts cost is less than 10$ / 10€. I found on the following offerings on amazon.de:

WARNING: This is a prototype that I built for my own testing purposes and is not finished yet. Whatever you do to your device: It is your own responsibility. Batteries are dangerous, if not handled properly!

It would be nice if Behringer offered a battery add-on (granted, not everybody needs lithium in their devices). @gekart

Posted in Uncategorized | Comments Off on Behringer TD-3 Rechargable Battery Mod Prototype

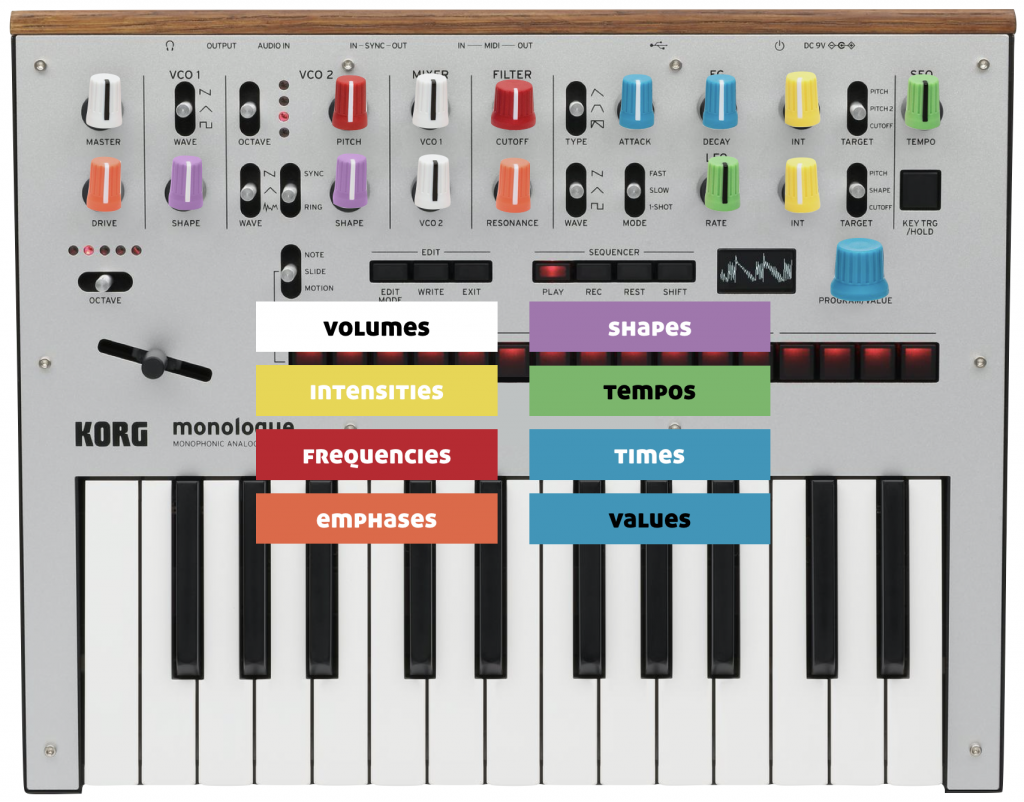
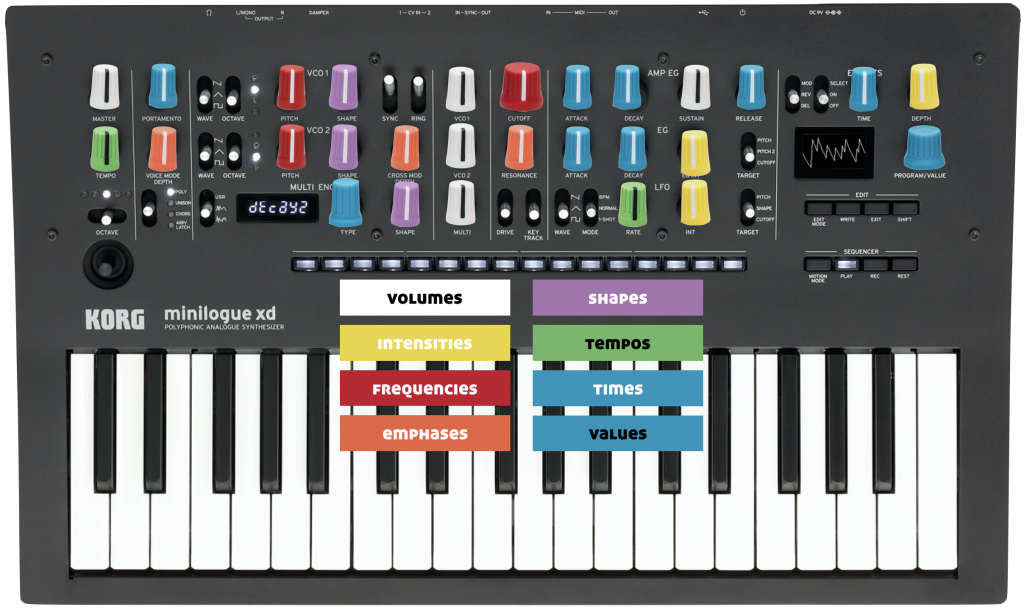
Korg Monologue and Minilogue XD Color-Coding Using Chroma Caps

Today I decided for a color scheme for the Korg Monologue and Minilogue XD. Tell me what you think @gekart.

Update

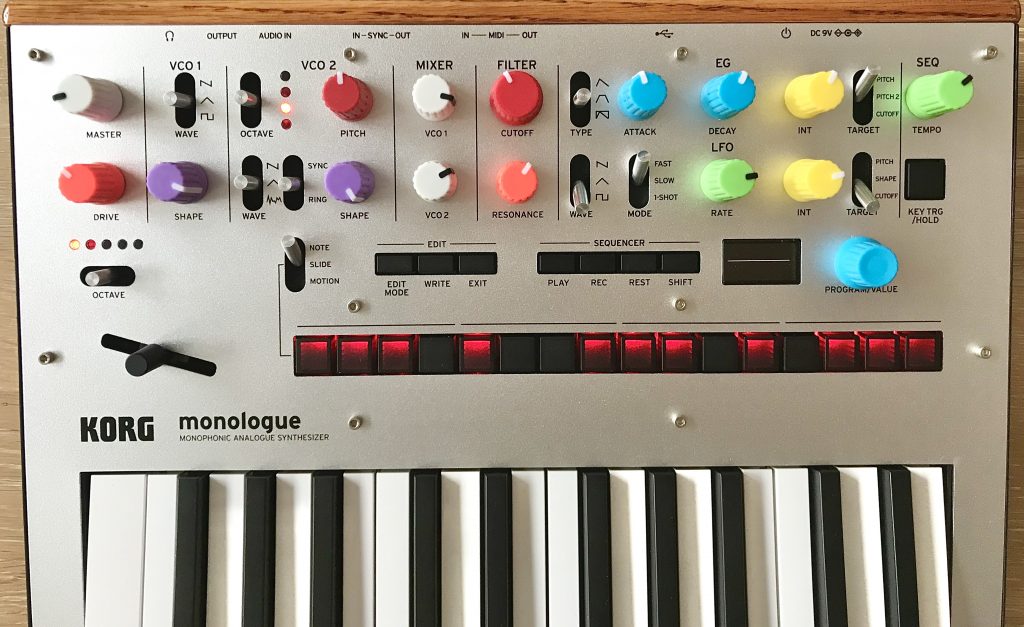
Final version on the monologue:

Issues:

  • The filter knob I purchased in the standard and fat version. The fat one is a bit less tall than the others.
  • The hight of the knobs is not precisely the same, so I needed to adjust it carefully.
  • The rotary knob for program / value doesn’t fit, since the shaft in the monologue is recessed and therefore too short. I will have to prolong the knob somehow (as is done on the original knob).
  • For live performances it would be best to switch the orange and red knobs, since the orange ones glow in the dark and you probably want your cutoff to be very visible.
Posted in Uncategorized | Tagged , , , | Comments Off on Korg Monologue and Minilogue XD Color-Coding Using Chroma Caps

Värde Utrusta Wall Cupboard Hinge 30min Fix Ikea Pro Hack

Ikea offered a nice modular kitchen in their program from end of 1990s and 2000s.

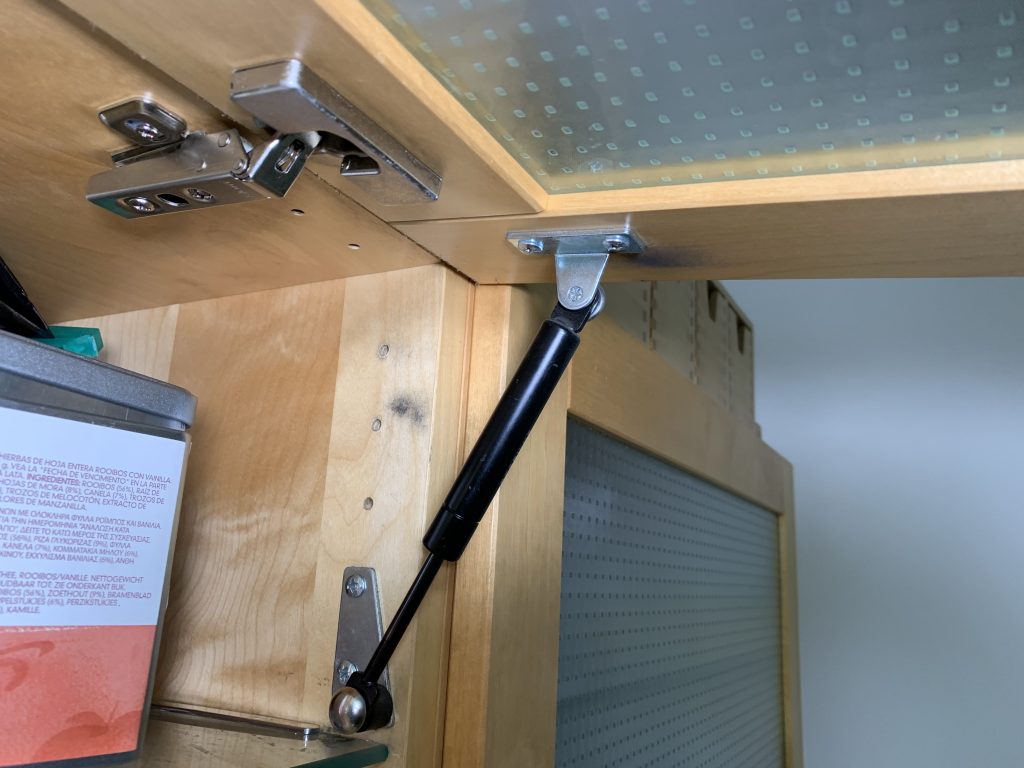
Unfortunately, they didn’t support it well. I assume it was too expensive to produce. Ikea also resorted to cheap technical solutions. For example, the 70cm wall cupboards that were available in variants with or without glas doors and in white or birch had a very poor solution to hold open the horizontal door. It was a damper that just had to fail eventually.

I replaced the damper multiple times and the replacements got quite expensive on eBay, since there were no original parts available. So, we gave up in the end: The new kitchen is in the early planning stage.

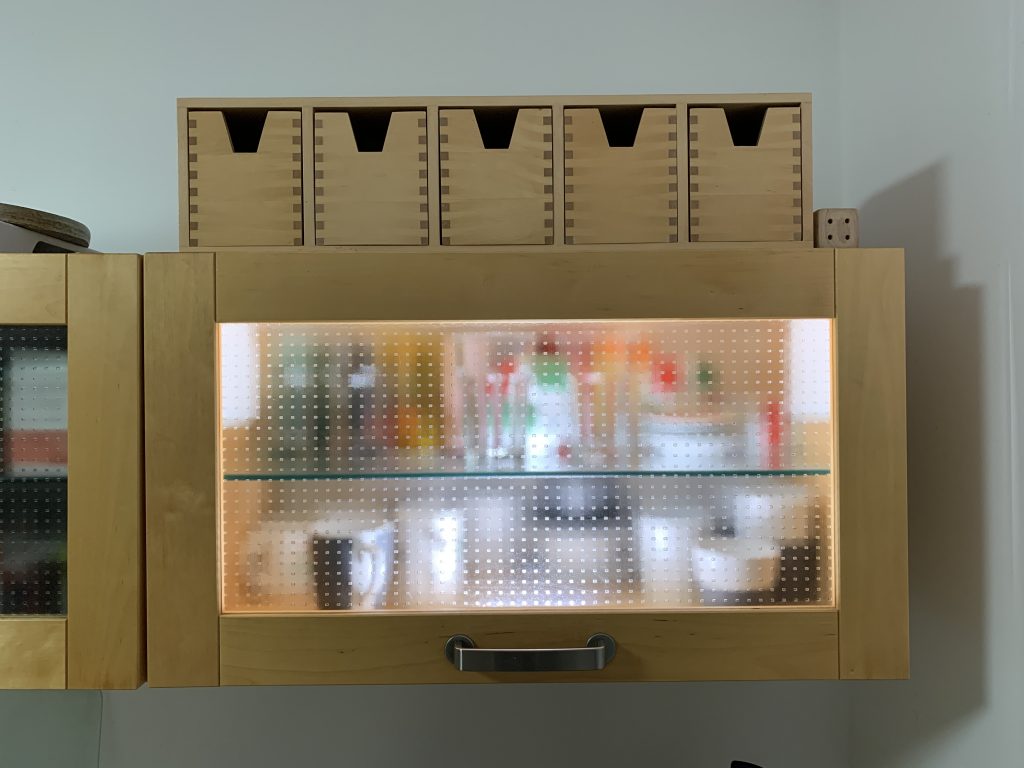
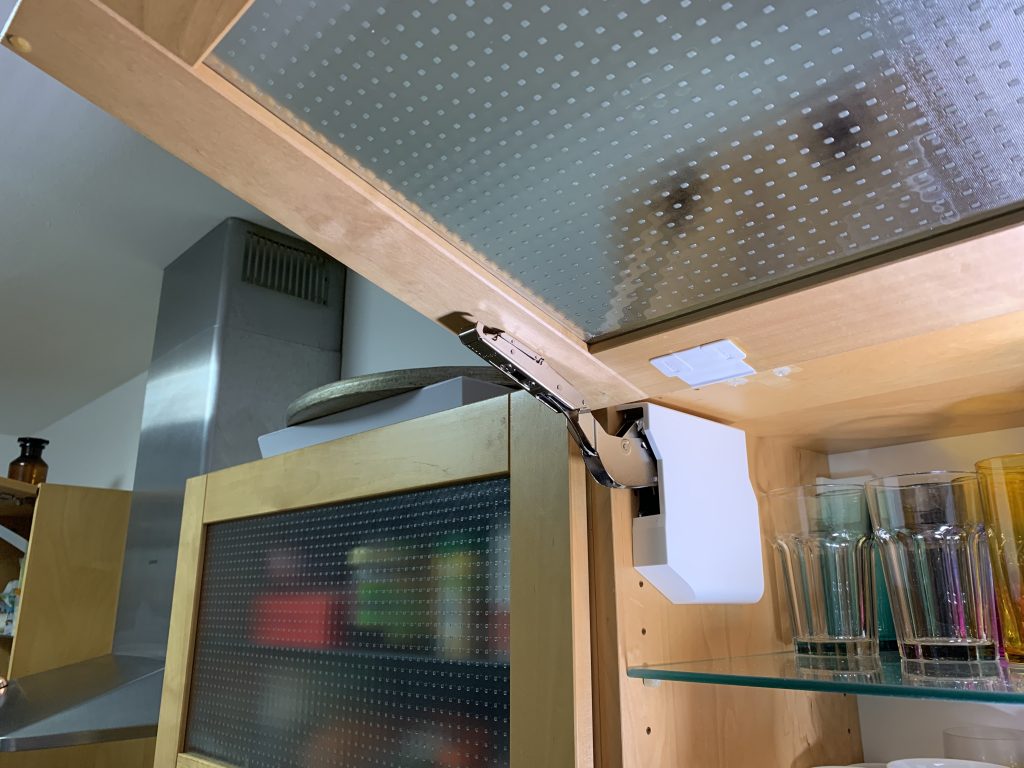
However, since I had some spare small Utrusta hinges (https://www.ikea.com/us/en/p/utrusta-small-hinge-for-horizontal-door-white-90265736/) with some research I managed to replace the dampers. This is how the result looks like, before applying finishing touches:

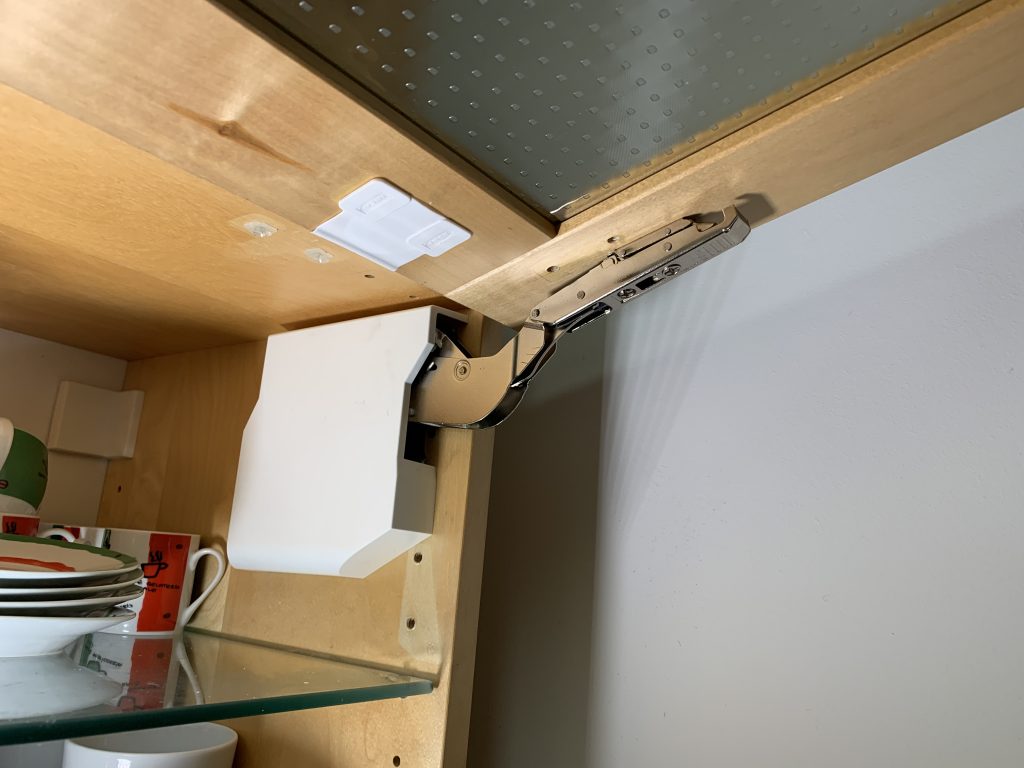
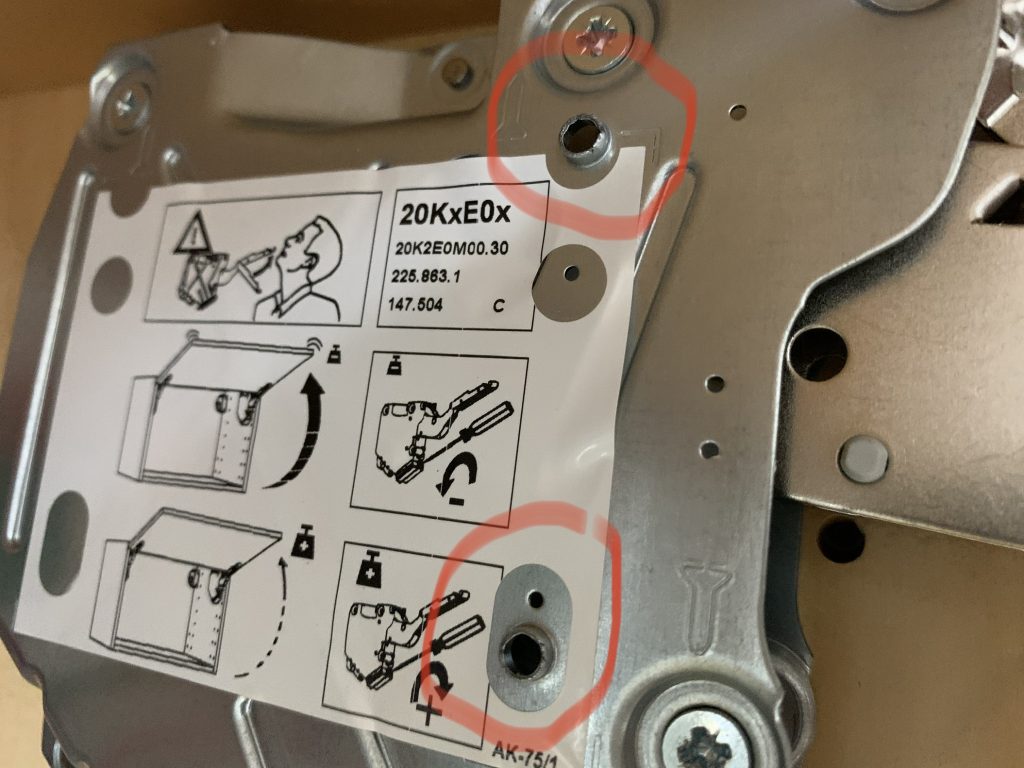
The most difficult part of the story is that there are no mounting holes prepared to position the hinge correctly. See the red marks in the image below to find the positioning protrusions / bolts of the hinge. We need to drill two per holes per side at the correct positions using the correctly sized wood drill (only 3mm deep!).

Pick the correctly sized drill for the protrusions. Hint: Use the pre-drilled holes of the cabinet to double-check the drill size (size is 5 in Germany, whatever that is elsewhere…).

Procedure

WARNING: You should know how to drill. Apply common sense. Don’t hold me responsible, I am just describing my solution.

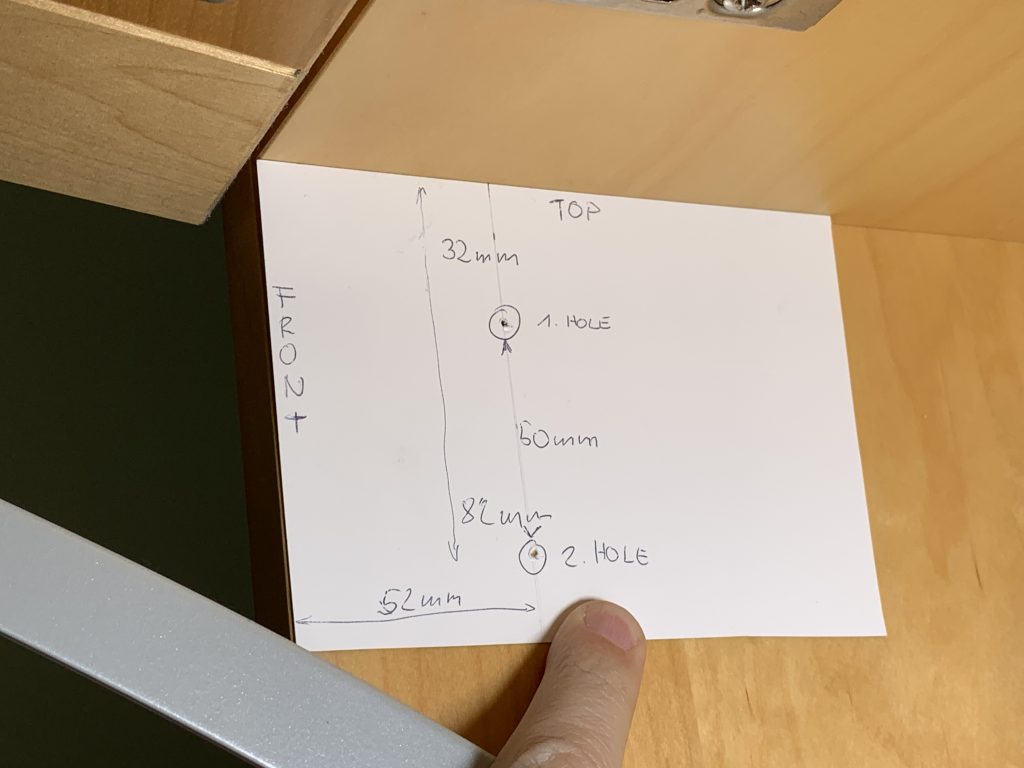
  • Prepare a paper template (use thick paper) with two holes, one 32mm from the top and the other at 82mm from top, both 52mm from the front (see image below).
  • Unmount the door by detaching the damper and the original hinges.
  • Hold the template to the top left and top right inner side of the cupboard and punch-mark two holes (with the wood drill, for example).
  • Drill a 3mm deep hole in each of the 4 punch-marks using a 5er wood drill. Do not apply too much pressure, you don’t want to drill a hole through the cabinet!
  • Attach the Utrusta hinge by pushing the two protrusions on the side of the hinge into the holes. If you worked precisely, the hinge should already be supporting itself.
  • From here on just follow the Utrusta mounting instructions.

And there you have it, this finally fixes the damper problem, works great with soft close and looks professional.

Posted in Uncategorized | Tagged , , , , , | Comments Off on Värde Utrusta Wall Cupboard Hinge 30min Fix Ikea Pro Hack

Enter Docker VM on MacOS Catalina (SSH, xhyve)

EDIT 2022:

The best way to enter the Docker VM as of 2022 is to use:

docker run -it --rm --privileged --pid=host justincormack/nsenter1

Deprecated:

As you might know, Docker containers need a Linux kernel in order to run (for Linux containers that is). So how does this work on a Mac, then, it doesn’t have a Linux kernel? Docker Desktop for MacOS will install a small Linux OS on your Mac using the MacOS-built-in xhyve hypervisor.

So if you are curious and want to poke around in Docker, you’ll need to enter the VM. Say you want to run ps on the host in order to see the individual containers running as processes, to watch how Docker images are stored or as I will show here: to see how containers are using overlay2 to merge the container filesystem with the underlying image filesystem then run this on your Mac after you started a container to get the container path:

docker inspect --format='{{.GraphDriver.Data.UpperDir}}' <container>

Now switch to the Linux VM:

screen ~/Library/Containers/com.docker.docker/Data/vms/0/tty

Then cd into the path returned by inspect. You will see the changes the container made into its filesystem or run ps to see the “real” PID of the container process.

In order to exit the VM again hit CTRL-A CTRL-\ and then y to confirm the exit.

Posted in Development, DevOps, Operating systems | Tagged , , , | Comments Off on Enter Docker VM on MacOS Catalina (SSH, xhyve)

Xcode 11 Unable to Boot Simulator Diehard

Xcode on my Macs had a persistent problem after updating to Xcode 10: the simulators wouldn’t work anymore. Lucky me, I was busy with AWS and Kubernetes projects… Updating to Xcode 11 didn’t fix anything. Searching the web didn’t help a ton, since there seem to be many similar problems and simpler solutions, that unfortunately didn’t help at all:

https://stackoverflow.com/questions/52778170/xcode-10-0-simulator-unable-to-boot
https://stackoverflow.com/questions/24033417/unable-to-run-app-in-simulator-xcode-beta-6-ios-8

The solution was to run the following command to reset the developer’s path:

sudo xcode-select --reset

Not sure if the reboot I did after that was actually necessary, but I did it anyway.

Moreover, while the installation of Xcode 11 went smoothly the update to 11.1 failed multiple times. Had to delete Xcode and reinstall cleanly. Now everything runs.

Posted in Development, Uncategorized | Tagged , , | Comments Off on Xcode 11 Unable to Boot Simulator Diehard

EBS Default Encryption Enables Launching Encrypted Instances From Unencrypted AMI Snapshots

Previously (before end of May 2019), you had to encrypt the snapshot backing an AMI if you wanted to launch an instance with encrypted root volumes. This had some consequences for sharing AMIs: not only had AMIs to be shared but also their backing snapshot. Once you established this, you had to copy the snapshot with encryption selecting a specific KMS key. Therefore, for each key you would have to create a new snapshot copy and thus a new AMI.

Now, the situation is much simpler. You can create root volume encrypted instances from any AMI, be it encrypted or not, and devise the use of a specific KMS key at launch time. You can do this by either setting “EBS Default Encryption” and therefore encrypting all your volumes by default (hopefully the policy you want anyway) or by specifying encryption and the corresponding KMS key at the launch of the instance.

https://docs.aws.amazon.com/AWSEC2/latest/UserGuide/AMIEncryption.html

Posted in AWS, Cloud | Tagged , , , | Comments Off on EBS Default Encryption Enables Launching Encrypted Instances From Unencrypted AMI Snapshots

AWS IAM Version and SID traps

In a IAM policy JSON, if you omit the version string, you are heading for trouble:

If you do not include a Version element, the value defaults to 2008-10-17, but newer features, such as policy variables, will not work with your policy. For example, variables such as ${aws:username} aren’t recognized as variables and are instead treated as literal strings in the policy.

Therefore, “you should always include a Version element and set it to 2012-10-17.” Seen in Policy Ninja 2016.

Also interesting is the SID, that is an optional identifier, but if it is present the SID MUST be unique in the policy. So you can throw it out and don’t mind pasting a ton of statements around. Where it really becomes tricky is when you are using Ansible AWS cloud module such as lambda. There the sid is used as a statement_id that is not optional, Ansible uses it to detect create vs. update, i.e. if a specific sid is present, it will just update it instead of inserting it. Typical, configuration management behavior. But now, no one is complaining if you want to insert a new permission statement but are using the same statement_id…

Posted in AWS, Uncategorized | Tagged , | Comments Off on AWS IAM Version and SID traps

Mac: Make Your External Drive Read-Only

I have a ton of music software content (samples, sounds etc) that makes it impossible to take with me on my MacBook Pro directly. Therefore, I bought an external USB-C Samsung T5 mini SSD that is super-fast and has a small form factor. I then moved my static sound library (Alchemy, Apple Loops, EXS samples, Native Instruments Komplete etc) to that disk and created symbolic links to that SSD.

Now, when I am in the hotel, I just connect that SSD to get my full library on the go. Very convenient and it doesn’t interfere with my business stuff. However, there is an issue: The drive can get disconnected at times (poor USB-C connector on Samsung cable) and sometimes when moving around with the laptop I just want to unplug that drive quickly without that annoying message from MacOS, that I wrongly disconnected that drive. And they are right, OSes nowadays continuously write stuff to drives and disconnecting without first ejecting the drive can result in corrupted files.

The solution for my use case is to make the drive read-only. Since I only use it for static files, this is just perfect. Now I can unplug the drive whenever I want accidentally or not, MacOS stays quiet. In addition, I cannot by chance overwrite files or move stuff around. And if I want to write to the disk, it is just a quick edit (change the ro below to rw).

How to do it? With the external drive inserted, run

diskutil info -all

and pick Type, Volume UUID and Volume Name of your drive. In my case this is:

   Volume Name:              T5
   Volume UUID:              20B59A9D-5A8B-4B57-B4F7-03123445B
   Type (Bundle):            apfs

Use vifs to edit your /etc/fstab (the unix way to mount file systems) and insert these two consecutive lines (per volume):

UUID=20B59A9D-5A8B-4B57-B4F7-03123445B none apfs ro
LABEL=T5 none apfs ro

The ro stands for read-only. Now eject the drive once more and insert it. If you run diskutil again and you can check to set that the drive is no writable. You’re good to go.

Ping me on Twitter if you need details. @gekart

Posted in Music Production | Tagged , , , | Comments Off on Mac: Make Your External Drive Read-Only

Silencing your iMac: Decrease Minimum Fan Speed to 1000rpm

NOTE: This guide apparently only works up to Catalina and does not work on Big Sur.

I finally replaced my hard drive in my 2015 iMac 5k with a Samsung 860 SSD. Not an easy decision since you need to cut the Mac open. However, apart from the HD being way to slow, it is also very noisy: there is a hiss type of sound and rumble from the rotational mass. Unbearable in a quiet environment.

After installing the SSD, the speed and noise improvement are tremendous. But then, you hear the fan “idling” at 1200rpm resulting in quite a strong airflow and distracting noise no matter what your system load is. It seems that on my low spec iMac, the regular (Apple auto-controlled) rpms never get regulated above those 1200rpm, even when running Unreal 3D benchmarks. So the default 1200rpm can be seen as a static value: it doesn’t go above or below that no matter what you do to the system. I downloaded Macs Fan Control, but you can’t reduce rpm below the minimum 1200 (but you can go up to 2700). Luckily I found a way around that and reduced the minimum to 1000rpm, which is considerable less noisy! It makes all the difference to me.

What you need is a utility that is included in the smcFanControl tool. Its called smc and is also available separately on GitHub. From here on you must read the following first:

Warning
-------
This tool will allow you to write values to the SMC 
which could irreversibly damage your computer.  
Manipulating the fans could cause overheating and permanent damage.

USE THIS PROGRAM AT YOUR OWN RISK!

You can and will destroy stuff and I won’t take any responsibility, but here is what worked for me (assuming that you copied smcFanControl to Applications directory):

In the Terminal app type:

/Applications/smcFanControl.app/Contents/Resources/smc -k F0Mn -w 0fa0

This writes the for 1000 (0fa0) to the smc key F0Mn (minimum speed of fan 0). If you need further explanation, the GitHub repo provides a detailed readme.

After that, use Macs Fan Control to reduce the speed manually to 1000rpm. Reading out the smc info now looks like this:

/Applications/smcFanControl.app/Contents/Resources/smc -f
Total fans in system: 1

Fan #0:
    Fan ID       : Main
    Actual speed : 999
    Minimum speed: 1000
    Maximum speed: 2700
    Safe speed   : 0
    Target speed : 1000
    Mode         : forced

This results in almost complete silence in my environment. Yet, there is still considerable airflow and everything looks and feels great. What a relief!

Update 1:

Lowering the minimum speed below 1000rpm does not yield the desired results. It seems that the fan and its control logic can’t go well below that. By setting the minimum speed to 800rpm, the lowest ever achieved rpm that I got is around 960rpm.

Update 2:

After rebooting, the minimum fan speed got reset (by the system supposedly) to the original 1200rpm. However, after starting Macs Fan Control, it writes my desired target speed to smc so that still works! Great! Here is how that looks like:

/Applications/smcFanControl.app/Contents/Resources/smc -f
Total fans in system: 1

Fan #0:
    Fan ID       : Main
    Actual speed : 959
    Minimum speed: 1200
    Maximum speed: 2700
    Safe speed   : 0
    Target speed : 800
    Mode         : forced
Posted in Operating systems | Tagged , , , | Comments Off on Silencing your iMac: Decrease Minimum Fan Speed to 1000rpm